Why Summer Demands Better Electronics Skills
In spring, you can find bass visually — bedding fish, surface activity, visible cover. In winter, bass are in specific cold-water locations you can predict by structure type.
In summer, neither approach works well for the majority of the fish. The largest concentrations of summer bass are in 18–35 feet of water on offshore structure with no visible indication at the surface. Finding them requires electronics skills — specifically, the ability to read sonar well enough to distinguish bass from baitfish, identify productive structure from unproductive bottom, and position the boat for effective vertical or near-vertical presentations.
If you're fishing summer without using electronics actively, you're fishing blind.
The Two-Phase Electronics Approach
Summer electronics work happens in two phases: finding structure and finding fish on structure. They require different tools and different attention.
Phase 1: Finding Structure
Before looking for fish, identify where they could be. Summer bass relate to:
- Main-lake points with depth breaks
- Offshore humps with hard top surfaces
- Main river channel ledges and adjacent high spots
- Submerged road beds and old foundations
- Rock piles isolated from shore
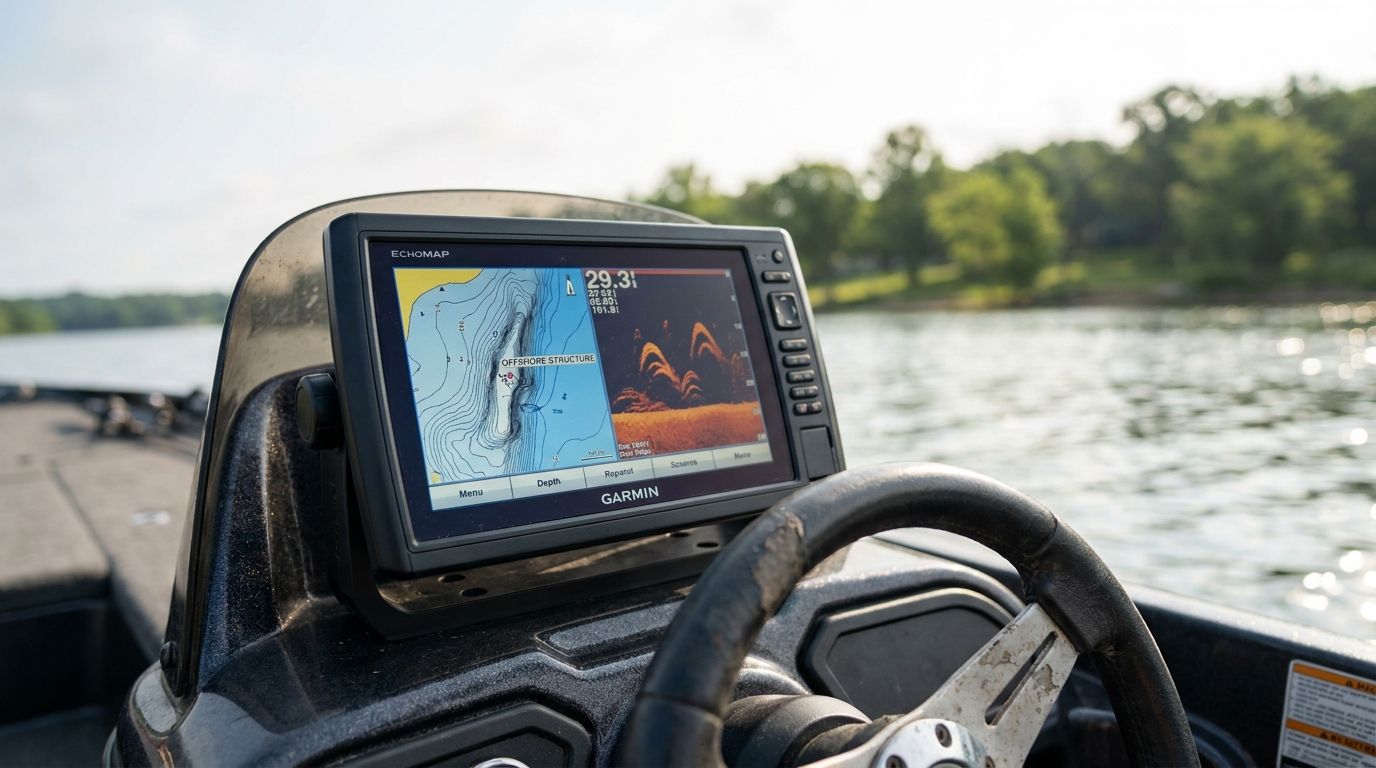
- Lake map overlay on GPS: Load a contour map on your unit and look for the 15–25 foot depth contour where it forms isolated features, sharp drops, or irregular breaks.
- Side imaging: Scan large areas quickly for structure. Side imaging shows you what's on both sides of the boat simultaneously — a single pass across a flat can reveal multiple structure features.
Idle over candidates at low speed, marking waypoints. Build a list of 10–15 structural features to evaluate, then prioritize based on what you see on side imaging.
Phase 2: Finding Fish on Structure
Once you've identified potential structure, the second phase is confirming fish presence.
2D Sonar: The primary fish-finding tool. As you idle the structure, watch for:
- Bass marks: Arching returns tight to bottom or slightly elevated. Concentrated on structure breaks, not scattered. Distinguished from baitfish by location (bottom-associated vs. mid-column) and return size.
- Baitfish clouds: Fuzzy, diffuse returns suspended in the water column. Often above where bass are holding. If you see a baitfish cloud with distinct marks below it, that's a school with bass underneath.
- Hard bottom confirmation: Thick, bright returns with double echo — hard bottom where bass prefer to hold vs. soft mud they avoid.
- Brush piles or isolated rocks that don't appear on contour maps
- Rock clusters on otherwise smooth bottom
- The shadow silhouettes of large fish resting on bottom
Reading Schooling Bass on Sonar
Bass that are actively schooling and chasing bait look different on sonar than bass holding on structure.
Active school:
- Marks moving in the water column, not stationary
- May show as a large, irregular return that shifts position between passes
- Often has baitfish marks above or mixed in, with harder marks below
- When they push shad to the surface, you'll see baitfish marks high in the column just before the surface boil
- Concentrated marks in a tight area, bottom-associated
- More stationary between passes
- Often a single defined depth layer — bass compressed on the thermocline boundary
Positioning for Effective Presentation
Once you've located fish, boat position determines whether you can fish them effectively.
Vertical jigging (jigging spoon, drop shot): Position directly over the fish. Motor off, drift or stake out. Drop straight down.
Football jig / Carolina rig: Position up the slope from the fish, cast toward them, drag back through the school. Fish from deeper to shallower to take advantage of gravity and maintain bottom contact.
Crankbait on ledge: Position in deeper water, cast up to the ledge top, retrieve down the face. The bait deflects into the school as it drops off the ledge break.
Swimjig at school depth: Position upwind, cast ahead of the boat, retrieve at the depth fish are showing. Effective when fish are elevated off bottom.
Marking and Returning to Summer Spots
Summer offshore bass in reservoirs don't scatter day to day the way spring fish do. The same school may be on the same hump, at the same depth, for three weeks straight.
Mark everything:
- Structure waypoints (the hump, the ledge)
- Fish waypoints (where you caught them specifically — the upstream end of the hump, not just "the hump")
- Depth and position notes
Return during the same conditions that produced. If you caught fish at 22 feet at 10 AM in moderate sun, start there next trip. School behavior is consistent.
For the broader summer offshore pattern, see Bass on Main-Lake Points and Early Summer Shad Patterns. For winter electronics application (same skills, different season), see How to Use Your Fish Finder to Locate Winter Bass.
The Offshore Deep Shad Kit covers the presentations needed once electronics have done their job. Use the Fish Finder tool to match lures to the structure and depth you're marking.
Electronics mastery for bass fishing at Bassmaster — they cover offshore electronics in multiple detailed articles each summer.